Monday, February 13, 2023

Chicken Wire Quilt in Chickadee

Hey, Hi there!

Are you hopping along with Chickadee?
What is Chickadee you say?

Well, it is an absolutely cute new fabric line by my friend 
Heidi Pridemore from 
The Whimsical Workshop.

Want to see?
I know, silly question.

Well, here it is:

It's all about the chickens!
Oh, and 10" squares.

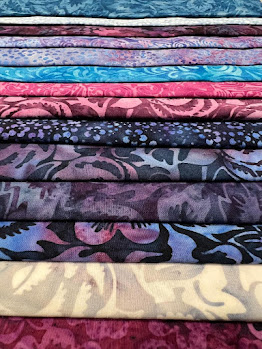
I was so excited to get started, I cut my squares up before I even took a picture.
I did remember to show what the pretty cutting pile looked like.


What did I decide to do with my 10" squares?
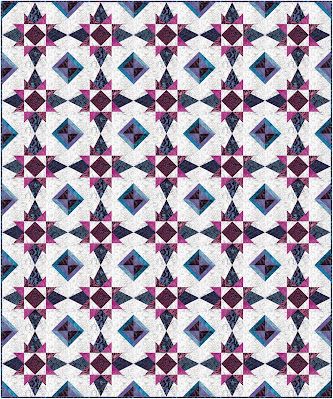
Well, I made a Chicken Wire Quilt.
A very colorful one at that.

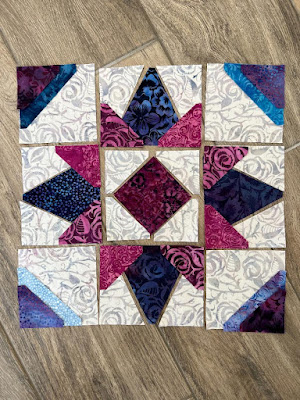
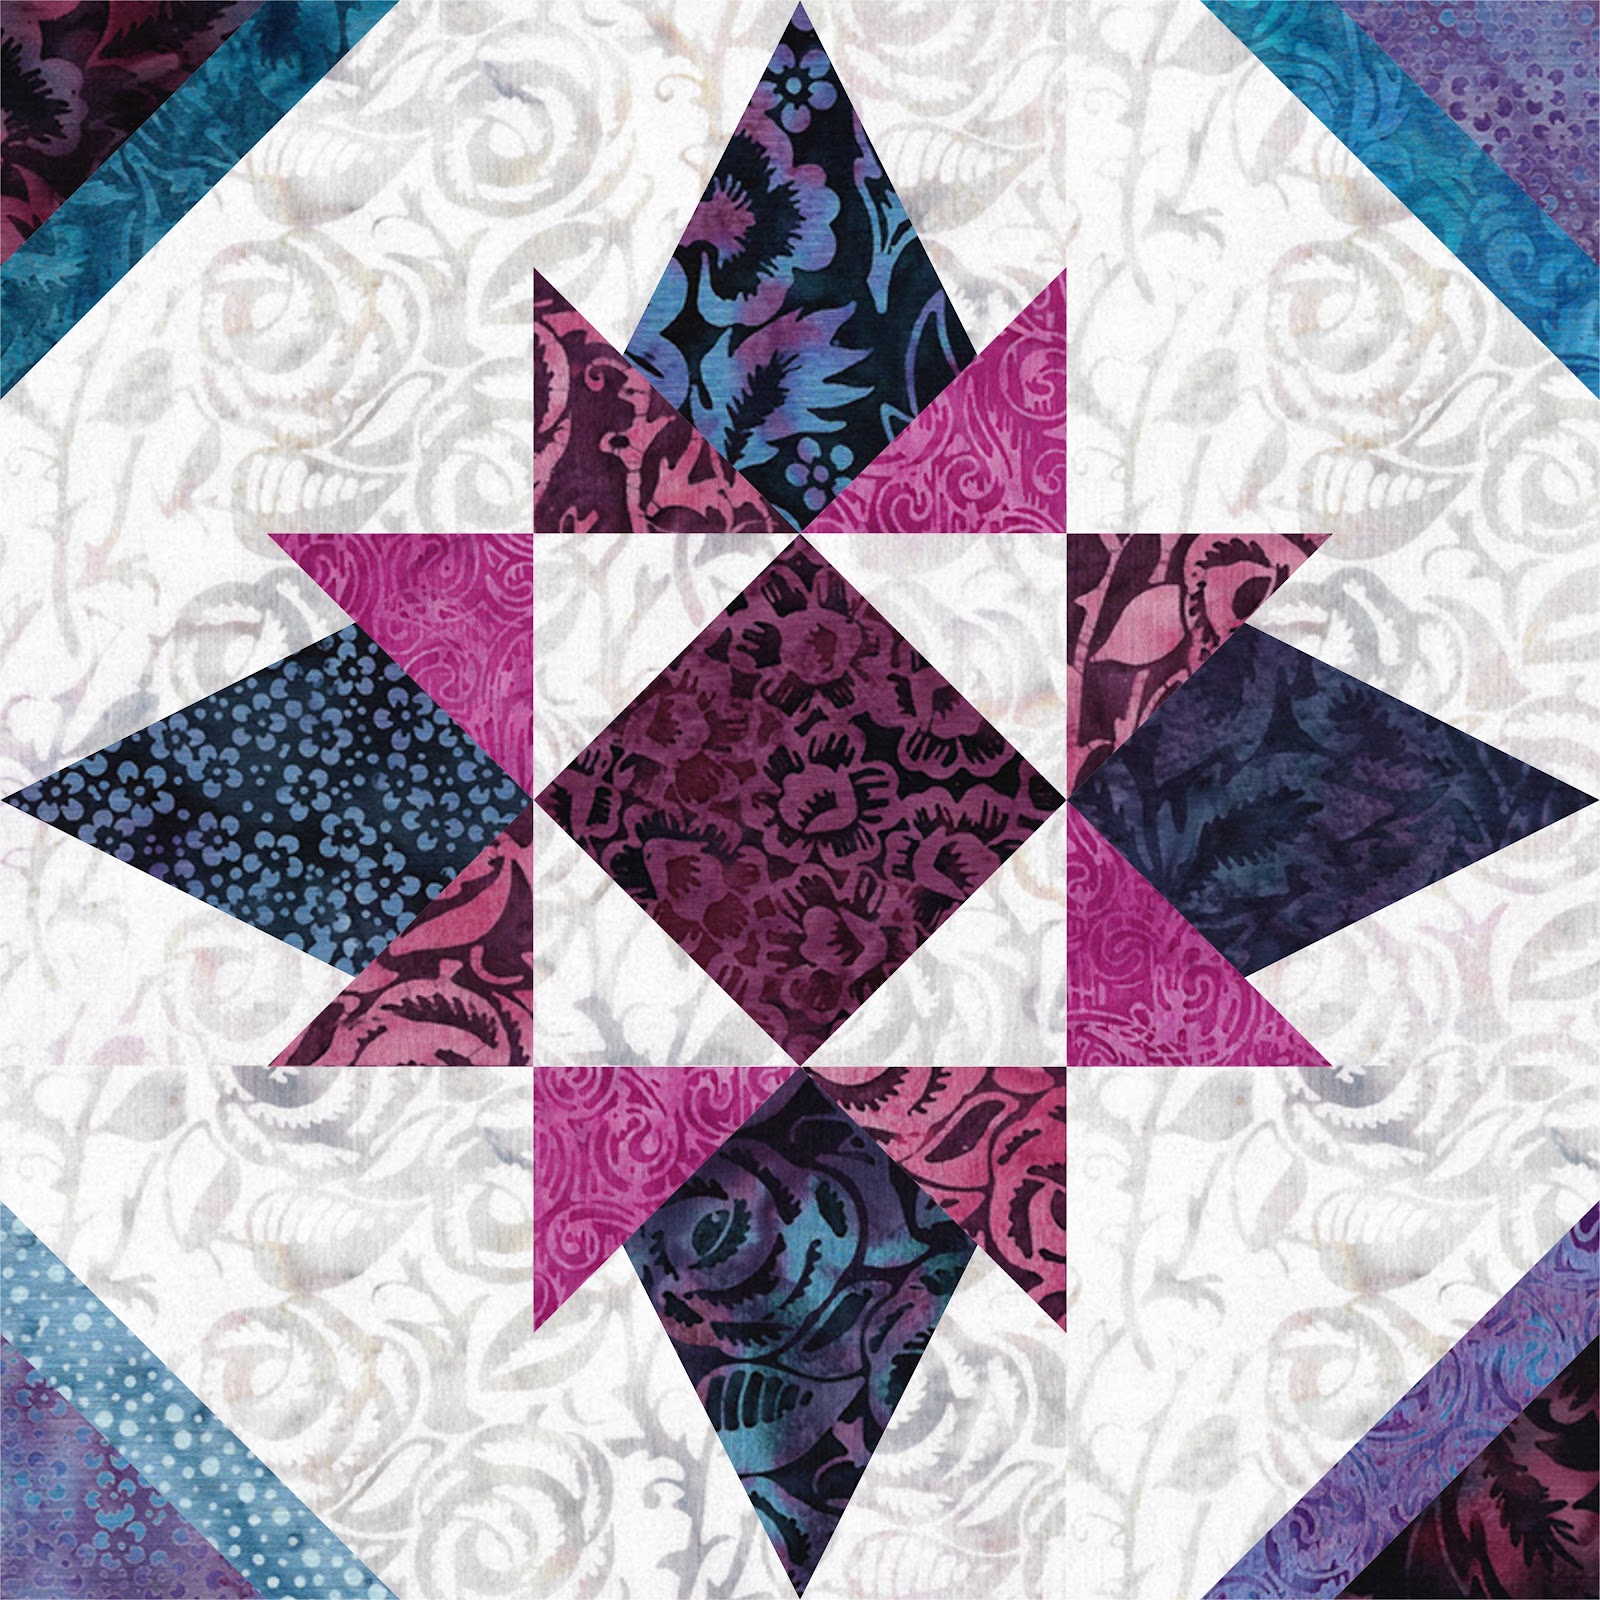
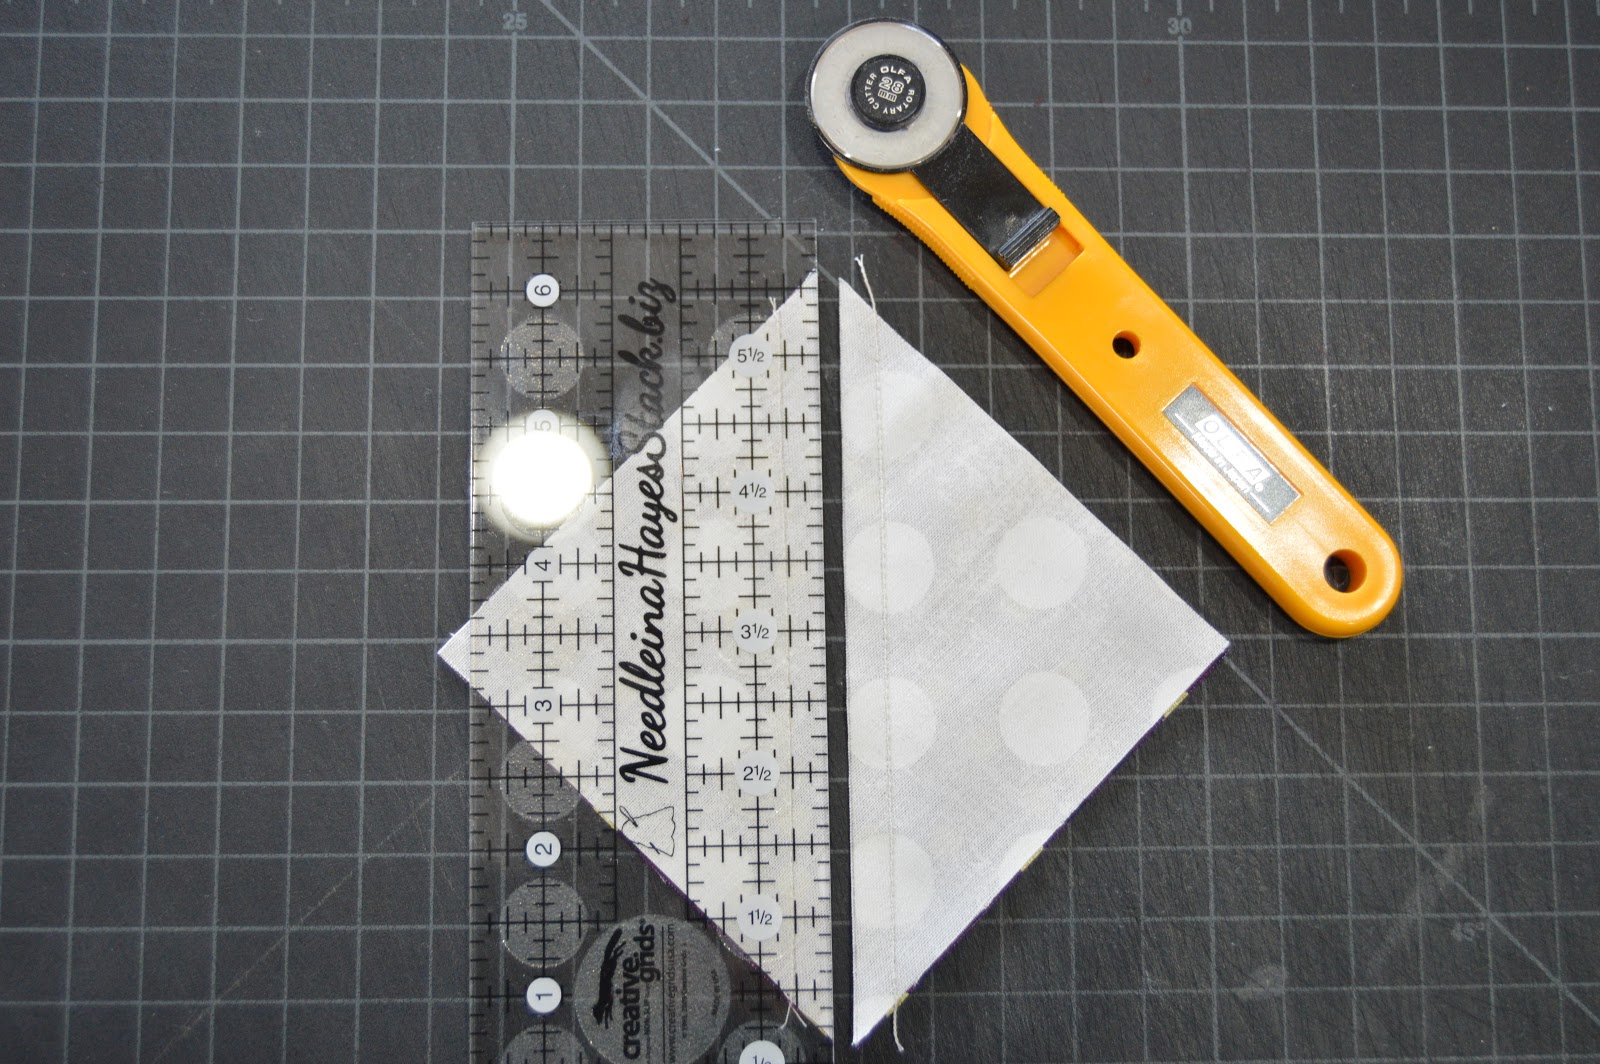
I cut my 10" squares into squares, rectangles and triangles.

Then I sewed them back together.
That is what we do, right?


I had to lay my pieces on the design floor (lol).
We are having a brand new building constructed that will hold my studio.
Until then, the floor will have to do.

I am not loving using the floor and am longing for a brand new, 
really big design wall!

I sewed my prices together into rows.
The rows into a quilt top.


I will wait to quilt this one up until the Long Arm is set up in the new studio.
How will I quilt it?
With an Edge to Edge Chicken Wire design, of course.

This quilt was not only easy and fun, but also inspired by my next door neighbors.
Would you like to meet them?


These are just a few of my feathered friends.
Their Momma is a crazy chicken lady (self proclaimed).
She is also the sweetest neighbor ever.

We live in East Texas and we had a beautiful day, 
so an outside picture or two happened.
I love the trees in my backyard view!
Don't you?


We decided to get a picture with the new Studio in the background.
It's gonna be awesome!


Well,
I hope you like my Chicken Wire Quilt creation.

If you are interested in the pattern it can be found on my website:
Just search for Chicken Wire.

Now hop on over to the next blog.
I've listed all the participants for your viewing pleasure.


Thanks for hopping along.
I hope you enjoy the journey.

Until next time,
happy quilting,
Tiffany


Friday, September 9, 2022

Woodcut Blossoms

  Welcome my quilty friends!


I must tell you this batik line by Heidi Pridemore is rich and gorgeous!

My photography skills do not to it justice.


Heidi asked me to join in this Blog Hop and I "jumped" at the chance.
I decided to create a block using The Goddess Tool.
This  is not a beginner block, but I think it is a beauty!

Have you heard of The Goddess Tool.
You can check out a video tutorial following the link below:


First thing I did was cut out each and every piece I needed for the block.
I laid them lout nicely for you to see.


Next I stitched together the units.


Then I assembled the units to make the block.
You know how this goes, one step at a time.

Almost everything I design is created in EQ8.
I have the need to see how everything will look before I cut and sew.


It is also easy for me to see how a single block will look when I repeat it into a quilt.
Do you want to see too?

Oh good.
Because that is what is next:


This is 30 blocks all put together.
No sashing or borders (although I could've added them too).
Just finished off with binding!

I hope you enjoyed my creation with the Wood Blossoms line.
A great big thanks to Heidi for asking me to play along.

Here is a list of all the Bloggers:


Until next time,
Happy Quilting,

Tiffany

Friday, July 5, 2019

I'm a Goof & Life Happens - Blocks 5,6 & 7 - Mix It Up Quilt Along

Well,
Where do I start?

How about with Block 7?
So Block 7 is this weeks post,
but I need to take a couple of steps back in time
and try to clear up and catch up on a couple of things.


I posted the wrong block for Week 4.
It should've been the Times Table shown below.
Just follow Nancy's fabulous instructions
in the Mix It Up pattern book.
I used shades of the Plum fabric for the outer 4 squares.
I used 2 Persimmon squares and
5 Honey squares for the center squares.
You need a total of 7 of these Times Table blocks.

Now, last week should've been the Double Geese.
Where was I?
Missing in action!
I love Flying Geese!
And these Ombre Geese, Oh My!
I made three geese with each of these fabrics:
Lime Green, Persimmon, Lagoon & Plum.
I combined them so all three sets had the geese flying in the same order.

Now, back to Block 7!
This week is another Designer Choice Block.

For this block I cut enough for 3 blocks
(next week I plan to do the last Designer Choice block,
which only needs two).

I cut these pieces out with the Mini Goddess Tool.
I mentioned it in a previous post (Mix It Up - Block 4).
These are mini Tall Triangles.
Here is the center of the block.
I used the corner Cut Away along with a
Half Square Triangle to make a snowball corner.
Now I combined the Mini Tall Triangles.
I arranged all the parts of the block.
It is a rather intense 9-block.
I stitched it all together and here it is:
Let me know if you are crazy enough to want to make this block.
This 12" block is made up of 61 little pieces.
I know, I know, I am crazy!

Well, I hope you enjoyed following my progress.
I would love to see what you are doing.
Please post pictures of the Designer Duo Facebook page.

Blog at you later,
Tiffany


Friday, June 14, 2019

Mix It Up Quilt Along - Block 4

Wow!
I do not know about you, but these weeks seem to be zooming by!

Let's get to the good stuff, Block 4...


I have made this block with my NEW Mini Goddess Tool.

This is a sneak peek at the Mini Goddess Tool.

You can make your own tool or just check out
more about the tool by downloading the file below:


It does some really great things (very small).
Half Square Triangles, Quarter Square Triangles,
Tall Triangles, Half Tall Triangles and Corner Cut Aways.
Each shape finishes at 2", 1 1/2" or 1".

There is a lot going on.

Want to watch a video?
Here is the original Goddess Tool.

This block is made using the
Half Square Triangle and the Corner Cut Away.

Here is a link to the Fabric Requirements:
 Block 4

Now for some pictures to show you how to cut for this block.

Line up the Mini Goddess Tool on a 2 1/2" strip of fabric
using the Half Square Triangle portion of the tool. 

Cut the triangle.
The blunt edge of the tool will be at the top of the fabric strip.


Continue cutting triangles down the fabric strip
until you have the number of triangles listed
in the Fabric Requirements.


Now, trim off the remaining "Dog Ear" from each triangle.


I cut fabric to make 2 of these blocks for the Mix It Up Quilt.


Assemble the Lagoon pieces with the
small background square as shown below.


Us the Small Corner Cut Away to remove a triangle shape
from each corner of the Lagoon Square.


Some how I did not get a picture of the next step,
but you can now place a 2 1/2" Half Square Triangle
on each corner of the block and stitch it.

This is what makes the "Snowball" corners.

Make the Flying Geese Units
using the Stitch & Flip method.
I have described that in earlier blogs about the Mix It Up quilt.


Assemble the Block!


Whew!

Now, get busy and share you progress
on the Designer Duo Facebook page!

Make sure you visit the other designers too:

Nancy Rink, Nancy Rink Designs
Sarah J Maxwell, Designs by Sarah J
Elisabeth Hardy, Elisabew Quilts
Karen O'Connor, Lady K Quilts
Dolores Smith, Timeworn Toolbox Designs
Giuseppe Ribaudo, aka Giucy Guice

Blog at you next week,
Tiffany


Friday, June 7, 2019

Mix It Up Quilt Along - Block 3

Well, hello again!

It is Week 3!

This week each designer is to share the first of their own blocks.

So here is mine:


I did not give this block a name, but I would love to hear your suggestions.
Click below to download the Fabric Requirements to make one block.
I put three of these blocks in my version of the quilt.


Here is my fabric, cut and ready to assemble my three blocks.

Starting with the center (the pinwheel part)
I drew a line down the center of the Plum and Background squares.


Stitched 1/4" on either side of the drawn line.


Cut on the drawn line.


That will give me two Half Square Triangles.
I need four for each block.


On to the Flying Geese.
Draw that diagonal line again.


Sew right on that line and then trim 1/4" from the line as shown below.


Press.


Draw.


Sew and cut.


Press, you know this, right?


Tad-ah! A Flying Geese Unit.
I need four for each block.


Now, lay it out, and put it together!
Great job!

This block is easy peasy.


Now it's your turn.

Please check out my Mix It Up friends:

Nancy Rink, Nancy Rink Designs
Sarah J Maxwell, Designs by Sarah J
Elisabeth Hardy, Elisabew Quilts
Karen O'Connor, Lady K Quilts
Dolores Smith, Timeworn Toolbox Designs
Giuseppe Ribaudo, aka Giucy Guice

Be sure to join the FaceBook Page and share, share, share!
We love to see what you are creating.

Blog at you later,
Tiffany